
Hey folks, I’m Beck Hemsley! I’m fairly new to the world of 3D art, having just finished my first year of studying Games Art at Warwickshire College and University Centre. That said, as a mature student I’ve got years of self-taught 2D digital and traditional art under my belt.
Concept
This piece was my submission for the Airship Games Art Jam, June 2022, and it won ‘Judges Choice’. When I heard the theme was ‘Growth’, I knew I wanted to approach it from the perspective of personal and emotional growth. As a trans person, I wanted to express the growth we experience in every small moment of transition. I came up with a few ideas, and sketched them out in 2D before finally settling on this concept. It arose from a close friend telling me that she felt intense time pressure to access hormone therapy, in order to prevent irreversible effects from her body’s testosterone—the fear she felt towards leaving things ‘too late’. We so rarely see portrayals of elder trans women, and they are rarely represented with the respect and dignity that they deserve. I wanted to create a care-filled and loving representation, for folks who have never seen themselves shown to be truly beautiful. An art piece that would say: you are and will always be valid, and worthy, no matter your age, no matter how long it takes to grow into yourself.
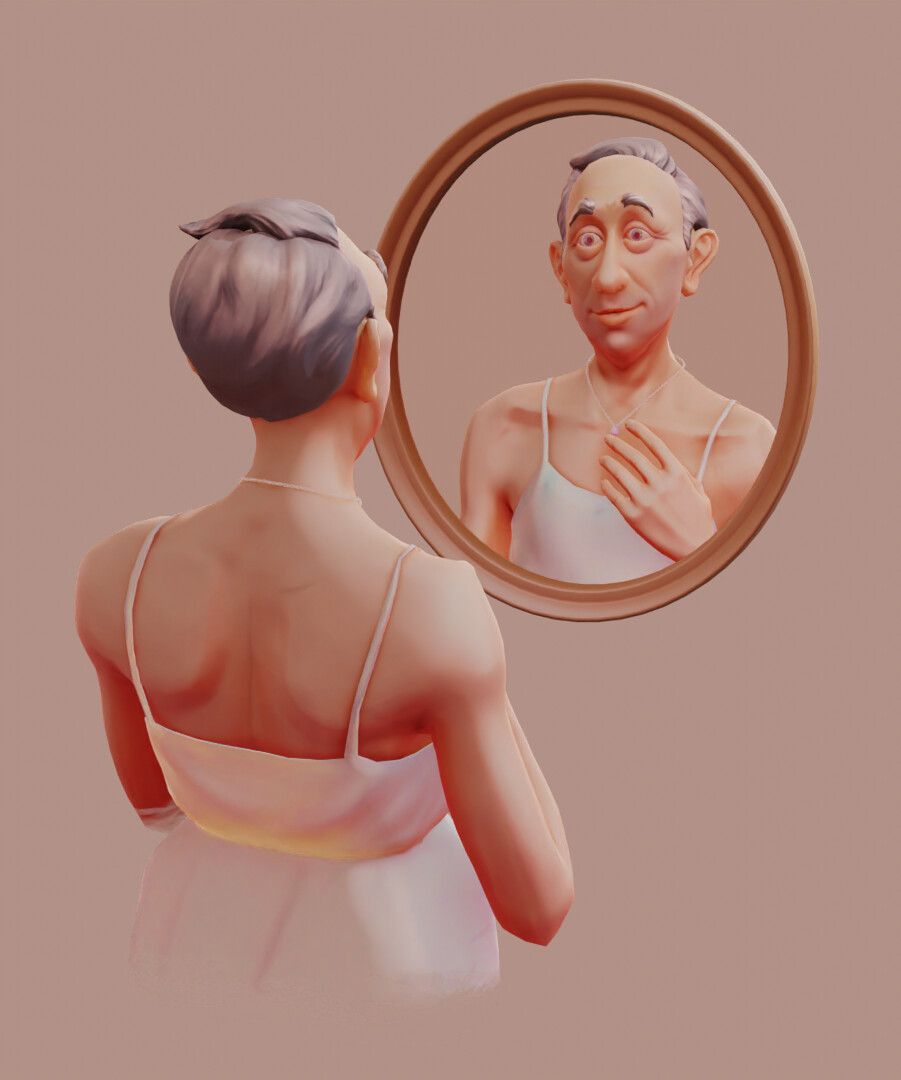
I’m hoping I’ve done the emotion justice here. This is someone discovering themselves for the first time—their first experience of gender euphoria. The gesture and expression is everything. I tried to capture a sense of gentleness, of a single moment of growth that is simultaneously ground-breaking but also fragile and vulnerable—the eggshell softly cracking.
The sculpt
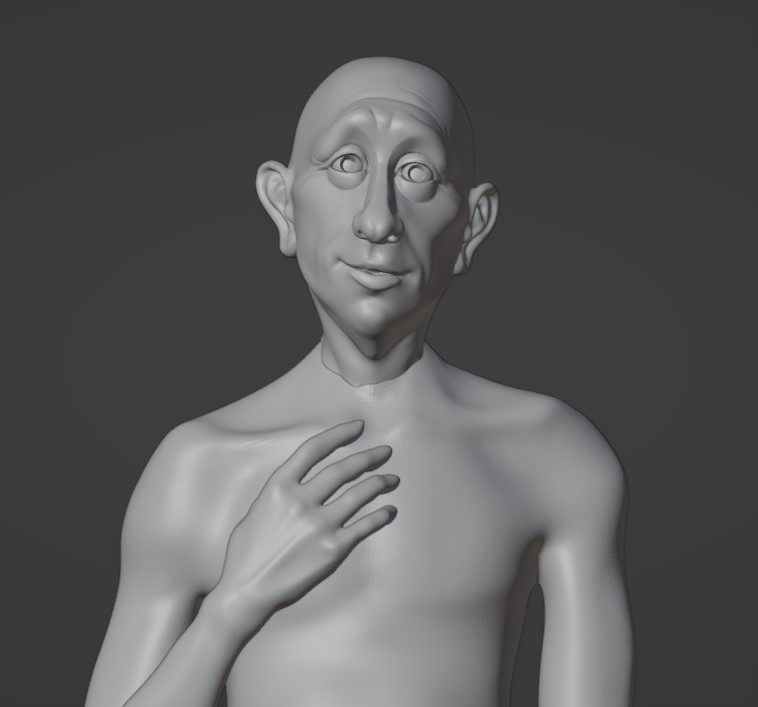
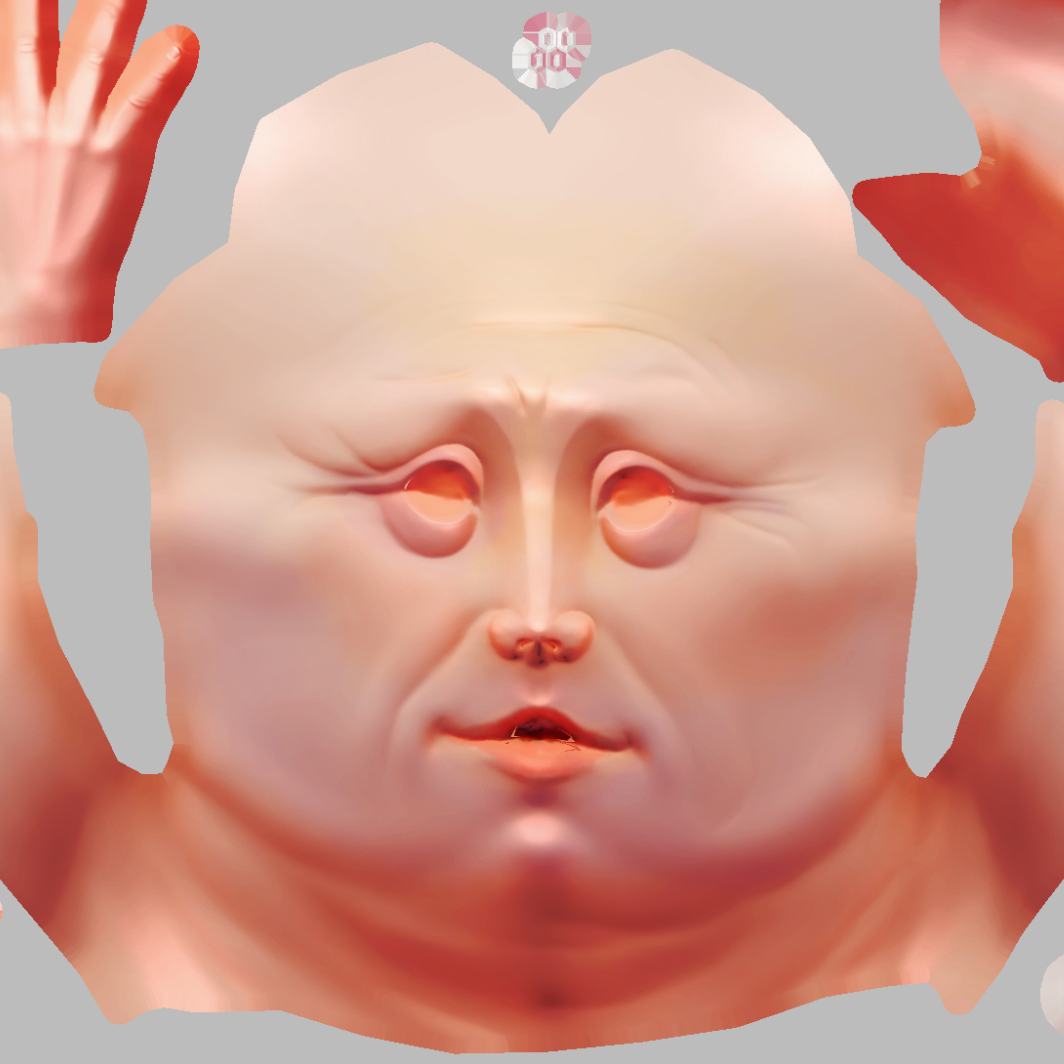
The modelling, sculpting and retopology was all done in Blender. I confess, I haven’t totally settled on my favourite workflow for sculpting characters yet, but I usually start with the face. The facial expression, after all, is crucial to this piece.
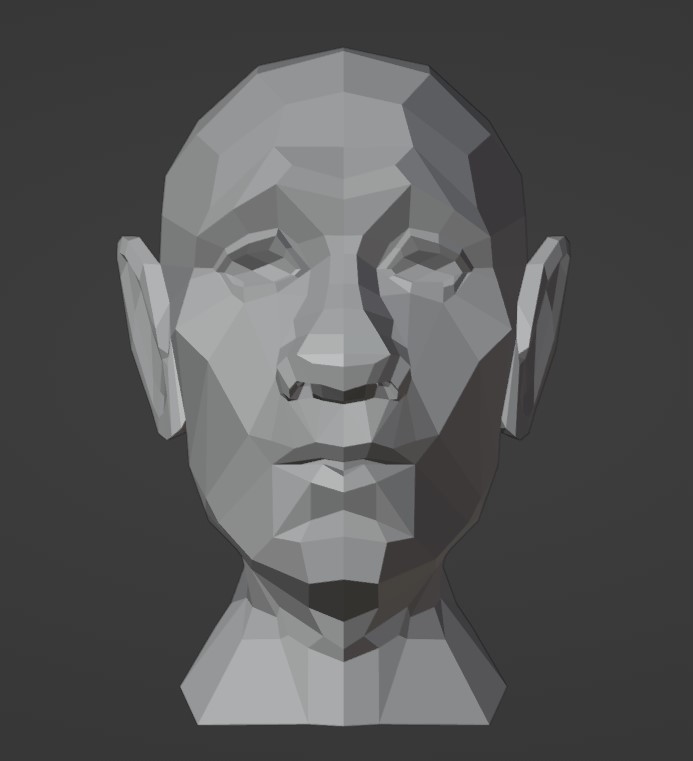
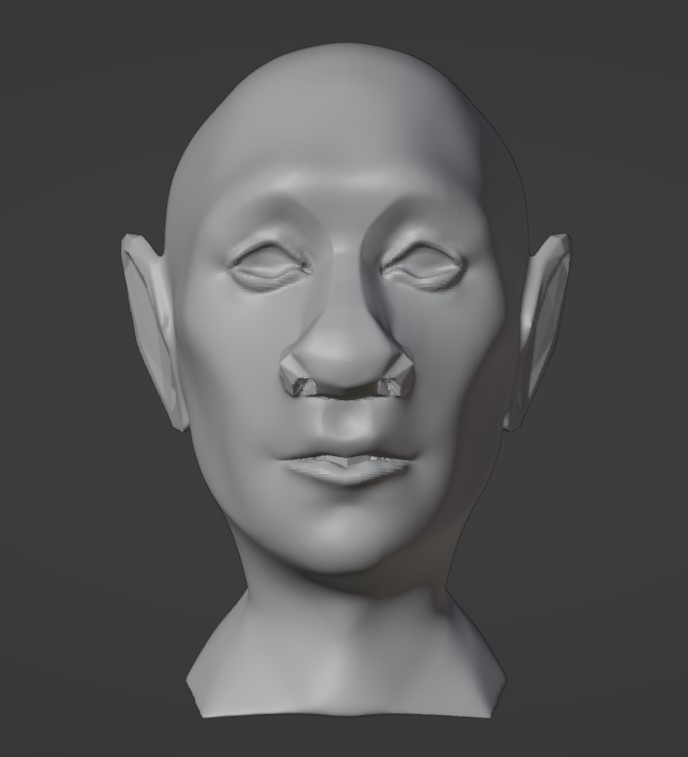
It’s a bit unique, but I generally start out with a version of the asaro head that I modeled with simple polygons, and then use proportional editing to push and pull the features into a face that I like. I find this helps me keep the planes and proportions of the head believable, while still being able to get a stylised basis for the face. One thing to remember is that these things will always go through an ‘ugly stage’, where you feel like you’re making terrible art. You have to just push through that! No-one is judging the process, just the final piece, and you need to trust yourself to be able to fix all the flaws that you see. From there, I go to the sculpting tab, remesh, and begin smoothing and scraping the forms.
One question I found myself wrestling with was that of gender markers. In character art, we are told that certain features or shapes are ‘masculine’ or ‘feminine’: we’ve all seen the memes about female cartoon animals being given busts and fluttering eyelashes. Good character design tells you something of that character’s identity through visual markers. Yet, as a trans person, my own ‘visual markers’ are often completely incongruent with my identity. How can we push character design to encompass people like me? How do we navigate the discord between character art as a visual medium that describes an invisible concept—the tension between internal world vs. external appearance? How do you make a static piece of art that ‘looks trans’, without being offensive or resorting to stereotypes? For this piece to stand on its own, the features would need to clearly read as someone who is older and has lived their life subject to testosterone, while still respecting and portraying them as female. I hope that I have navigated that line with care and delicacy.
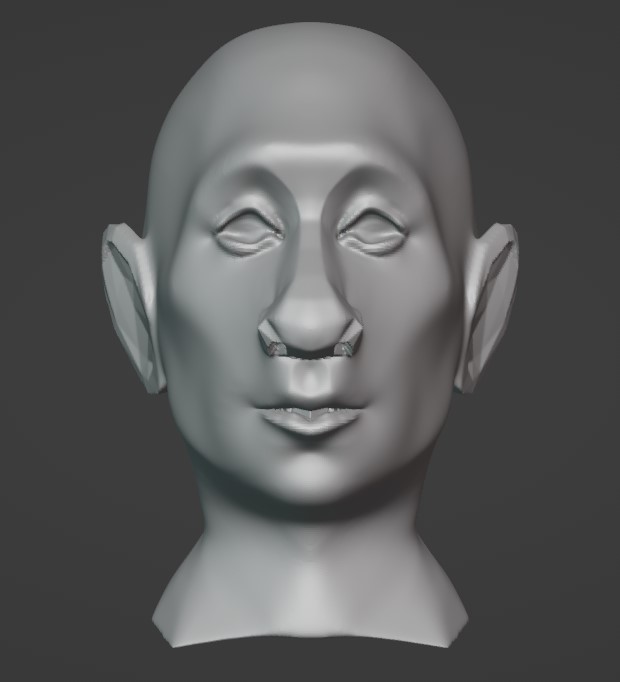
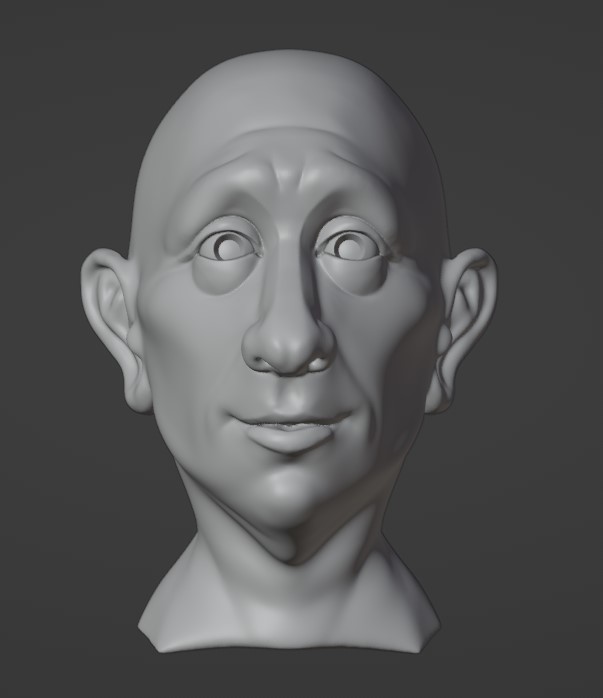
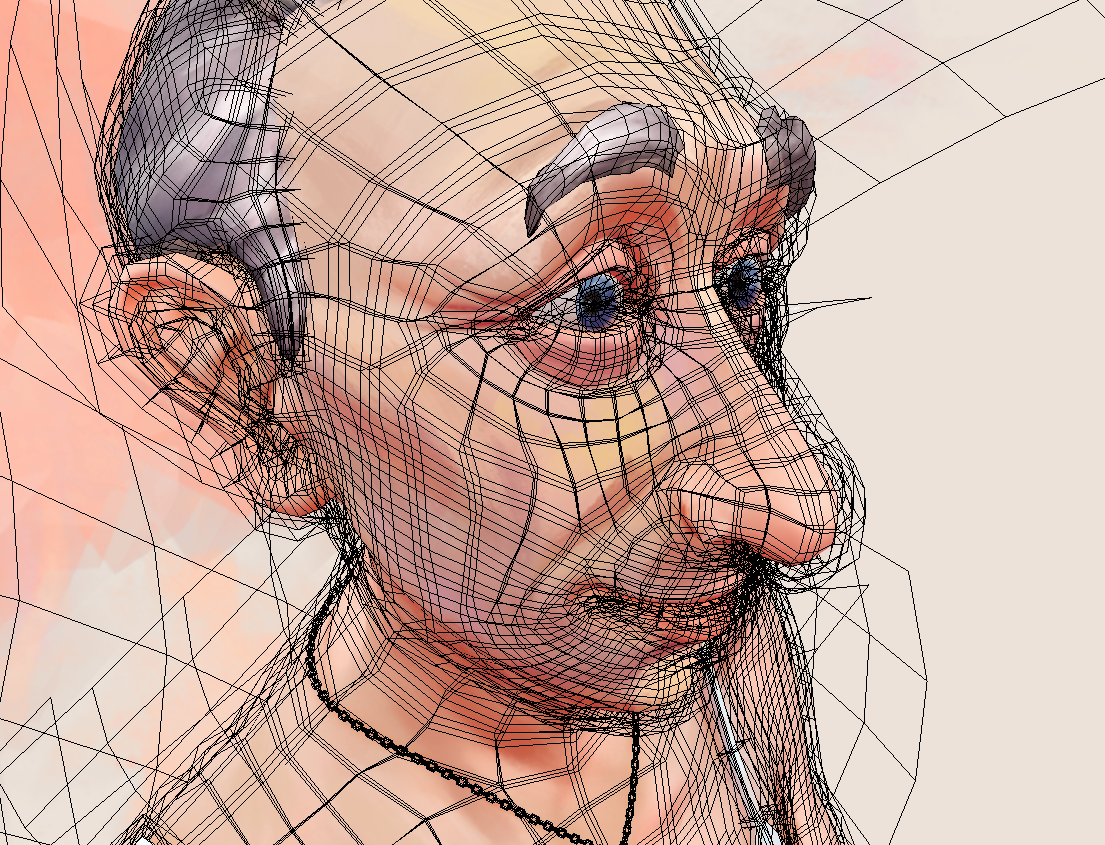
For my stylised faces, I like to keep some sharp plane-changes to emphasise certain lines and flow—in this instance, the arches at the ridge of the nose support the swooping line of the slightly-startled eyebrows. Mostly this piece warranted soft rounded forms. I used the grab tool to make major feature shifts, finding the face within the sculpture. It went through a lot of changes, and once I was happy with the general face, I broke symmetry and found the expression I needed—a soft half-smile and a gentle head-tilt.
For the body, I took the torso and hand from a mesh I’d sculpted earlier and modified them—again focussing on balancing smoother forms with sharper planes, exaggerating the clavicle as I knew that the necklace would be a focal point. It’s not really best practice, but as I knew this would be a static piece where gesture was everything, I modelled the arm in position and then joined it to the torso. My laptop was struggling with the model by this point, and masking wasn’t working—if I make a similar piece in future I’d approach it differently!
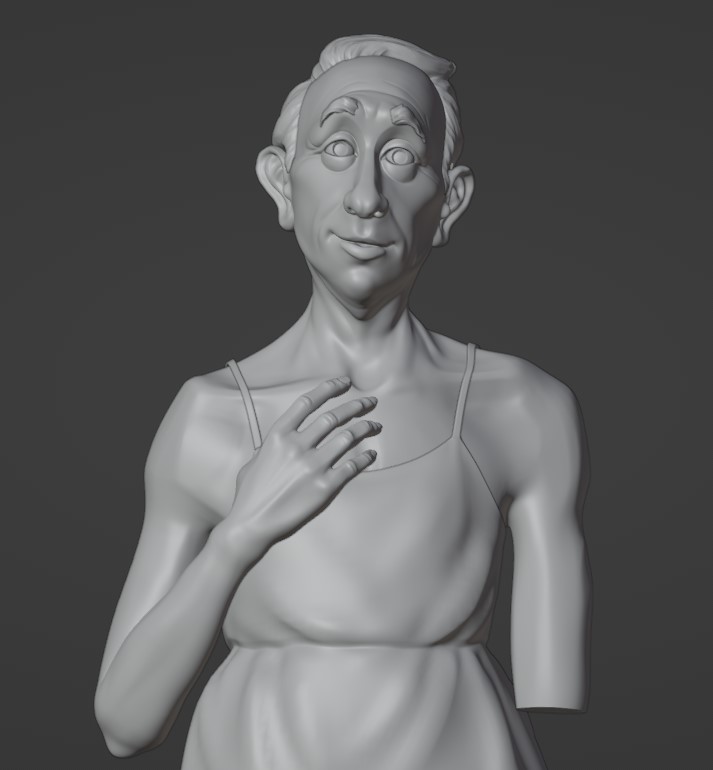
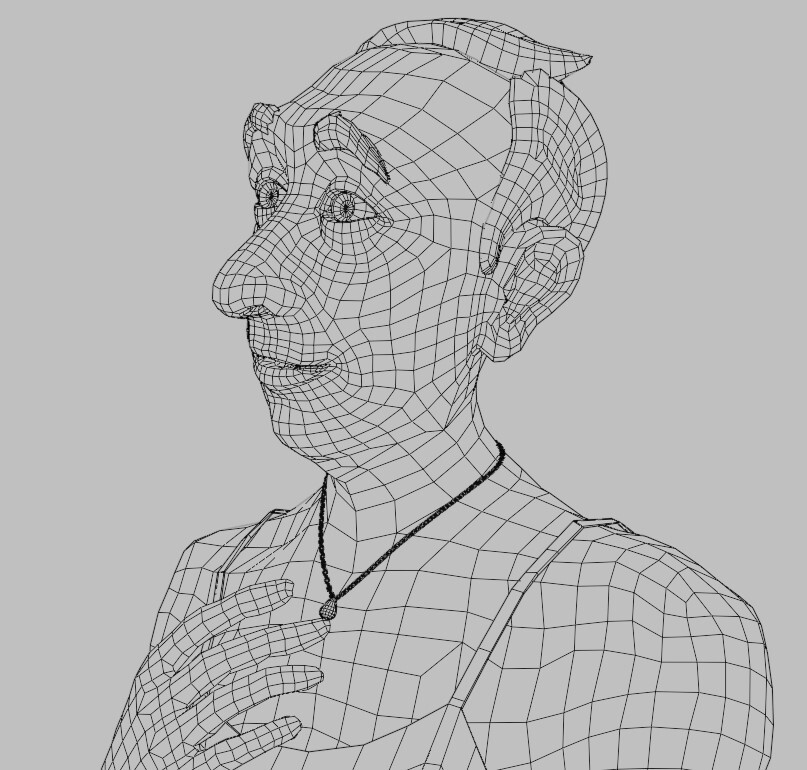
The hair and eyebrows were sculpted, but I modelled the dress and necklace in the Object/Edit mode of Blender. This meant it was easy to get my low- and high- poly models, as I could just subdivide to sculpt the dress. I retopologised the face and body entirely manually, because I’d never done it before. It was definitely a learning process, and I know that some of the lines aren’t flowing as well as they should—but by that point, I was aware of the deadline and just too eager to move on to texturing!
Texturing
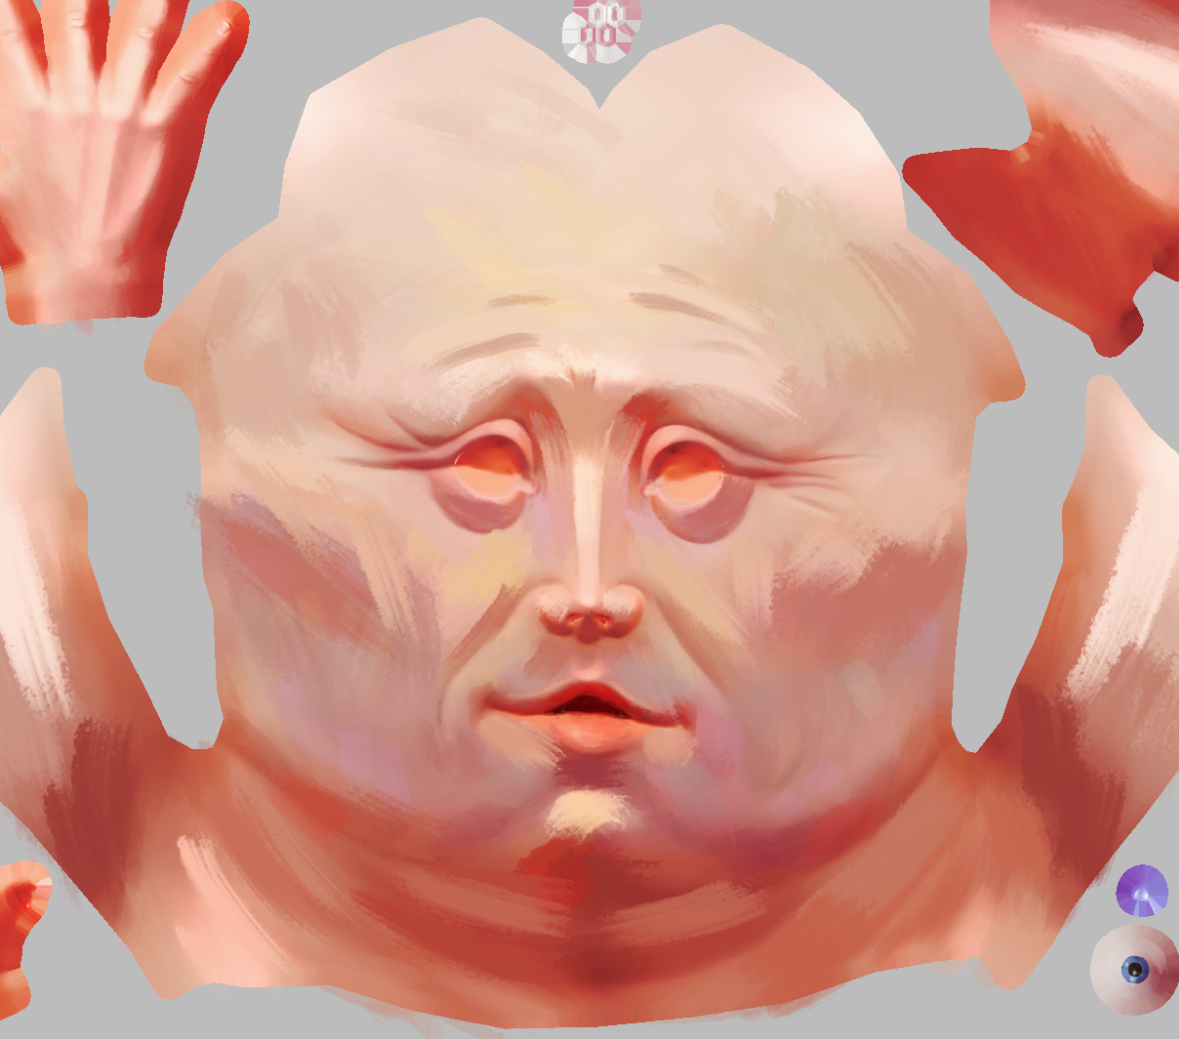
I knew from the start that I wanted this piece to be painterly—to look almost like a 2D art piece or illustration that happens to be viewable from all angles. It was always going to be diffuse only—no lighting outside of the model, so all the lighting and ambient occlusion needed to be on one texture. For this, I used Substance Painter and the tool SoMuchDiffuse. This is incredibly helpful for giving the basis of a hand-painterly style with interesting lighting. There’s a great tutorial here. Having a decent high-poly sculpt to bake onto the low poly is really helpful for this—all your work creating wrinkles and ridges is taken into account.
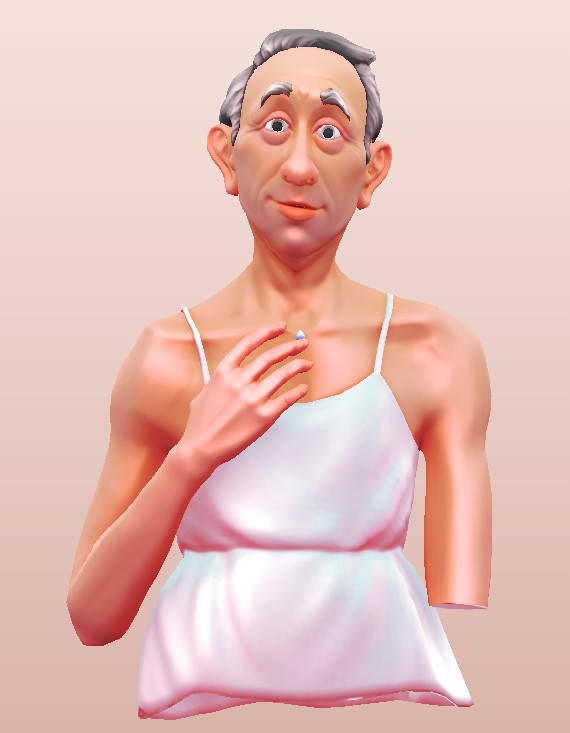
The colour palette was really important to the mood here. I went for soft, pastel colours to emphasise the model’s femininity. I’ve recently been fascinated with the use of red tones in shadows—red has a darker value even when at high saturation than other colours, so you can have the correct value for a shadow and it still ‘pops’ with brightness. Peter Mohrbacher does this masterfully—for example, in his piece Zuriel, Angel of Libra. SoMuchDiffuse allowed me to play with the lighting and give the shadows life and hue, including some gorgeous red tones. I also added subtle paint overlay layers for the basic ‘yellow, red, blue’ colour zones of the face.
I then took the texture and threw it into Photoshop. There, I created a new layer and used the dropper tool with a painterly brush to give texture and interest to the piece. Essentially: eyedrop a location > maybe shift the hue slightly > paint a brush stroke over that location. Let the strokes be visible but be aware of the plane changes of the face and don’t break the lighting. I also added detail to emphasise features like the eyes, mouth, and wrinkles, and pushed some of the highlights. There is always some to-ing and fro-ing here, applying the texture to the model and seeing what needs tweaking.
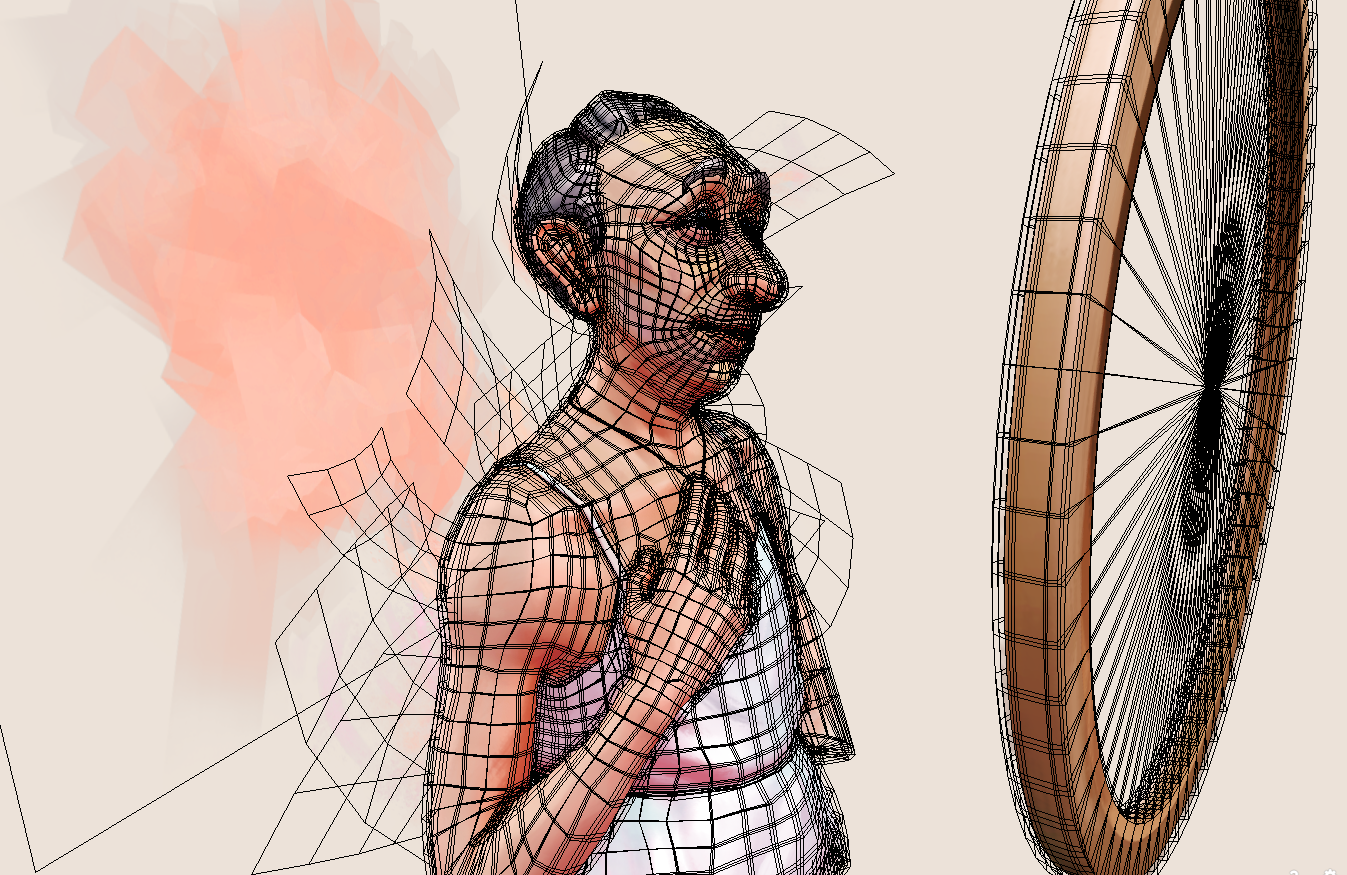
Finally, I needed to give it that extra ‘something’. Here, I was directly inspired by Miki Bencz’ incredible techniques for creating 3D paintings. His work is so good it terrified me—and as Brian Michael Bendis (creator of the character Miles Morales) said: ‘I did what you do when something scares the hell out of you creatively. You do it’. Thankfully, Bencz has written a fantastic tutorial about his approach, where he explains it better than I ever could. One key element is to create planes that sit out from and around the model, with brush strokes on them that help the piece blend into the background. The second is to duplicate and expand the base model, with an alpha texture of brush strokes that break and soften the harsh edges. The wireframe comes out looking a little strange, and the tri-count shoots up, but the effect is worthwhile for a 3D painting.
Sketchfab
When it came to setting up the final piece, I began to get worried when Blender’s render engines Eevee and Cycles were doing strange things with the transparencies. As I’m fairly new to all this, I may have missed something major, but I couldn’t seem to get a nice render that had backface culling, painterly transparencies and the reflectivity of the mirror.
Thankfully, I knew that Bencz had managed to make his techniques shine in Sketchfab, so I imported my diffuse and alpha textures in and hoped! This piece has no lighting, so it is set to ‘shadeless’, and uses just a base colour texture and opacity/alpha texture—set to blending, trilinear and luminance. Unfortunately, Sketchfab doesn’t allow for the mirror to be reflective—this is a shame, as I’d hoped for the viewer to be able to see the scene from the ‘outside’ and also from the perspective of the model herself—but we can’t have everything!
And there we are: the final piece. You can find some more renders and a gif of the process on my ArtStation.
I hope you’ve found this helpful, and thank you to everyone who has let me know that they connected with the piece emotionally—it means the world to be able to speak to people in this way.
About the author
Beck Hemsley
2D and 3D artist, studying at Warwickshire College and University Centre. Interested in character design, concept art and illustration. www.artstation.com/beckhemsley // @beckh_art


Absolutely gorgeous piece of work
Thank you for this spotlight! And the art! This portrait has a lot of added value in it – emotions, maturity, life experiences, self realization and all that is seen in the expression and body language of the protagonist. Great job on going beyond model into the meta.
Really elegant and touching. I like the way you handle the subject. Thank you for sharing so much of your thought process.
Did you try enabling Screen Space Reflections? Perhaps the mirror could work that way? Though i don’t know how well with this at style.
Beck this is a truly beautiful piece, I love how the model allows you to interact with her and look with her alongside her. You have really honoured your subject